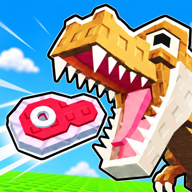
How do I raise Throw Food For Animals Throw Power?
Train on pull-up stands. Exact power per rep is Unverified. Two clips also show +5 per player level — still Unverified as a global rule.

Throw Food For Animals Throw Power is the listing growth stat on Place 120219252362013 (Goofy Chupacabra). Train on pull-up stands so food flies farther, new areas open, and higher shop foods become usable. Bar order, prices, and “+5 Throw Power per player level” stay Unverified. Play on Roblox.
| Fact | Detail |
|---|---|
| Place | 120219252362013 |
| Listing | Throw Food For Animals |
| Developer | Goofy Chupacabra |
| Universe | 10766972131 |
| Platform | Roblox |
| Stat | Throw Power — distance / area gate |
| How to raise | Pull-up stands (gym bars) |
| +5 per level | Shown in two independent clips — Unverified as a global rule |
| Perfect throw | ~+20 in clips — Unverified |
| Bar prices | TBA — do not invent |
| Created | September 18, 2026 |
| Last verified | October 31, 2026 |
Matched by build plan, shared topics, and guide progression — not random related links.
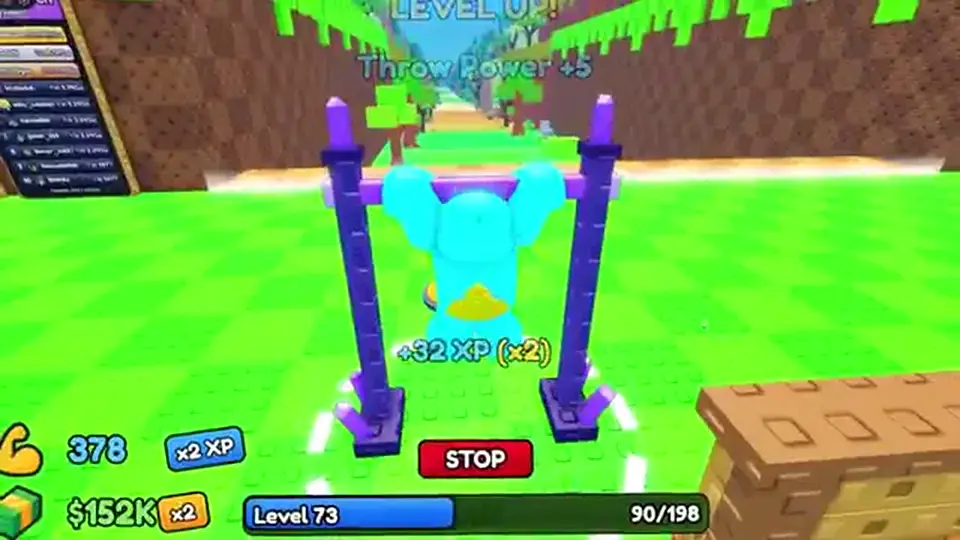
Walk to a pull-up stand on the plot, interact, and repeat the reps. Throw Food For Animals Throw Power is the stat that listing copy ties to throwing farther. Cash from parked animals pays the next stand; the stand is what moves the meter, not the Food Shop.
| Action | What it does | Beginner use |
|---|---|---|
| Pull-up reps | Raises Throw Power over time | Default after the first parked animal |
| Higher bar (when unlocked) | Faster or denser training — Unverified math | Only after the cheap bar feels capped |
| Player level | Two clips show +5 Throw Power per level | Unverified as a rule — still train |
| x2 Training Power pass | R$149 snapshot on some lists | Optional after the loop is automatic |
| Buying food | Changes what can spawn, not your max range | After you can land the biome |
Reps exist so the next Carrot, Apple, or Toast lands in a biome you can walk. If Forest is already collectable, you do not need a later bar yet. If throws die in the starter grass, more Wooden reps beat a shop purchase. Exact power per rep is TBA.
Two independent sessions show about +5 Throw Power per player level. That is useful flavor and still Unverified as a global formula, a cap, or a reason to idle for levels instead of using the stand. Until an in-game tooltip confirms it, treat level-ups as a bonus on top of pull-ups, not a replacement.
Once you know where the stand is, the next question is which named bar you are actually using.
Clips name gym bars. This page lists those names only. Order and prices are Unverified. Do not copy a spreadsheet that fills in cash costs we have not seen on a shop row.
| Stand (clips) | Note | Price / order |
|---|---|---|
| Wooden | First beginner bar after the first park | Unverified |
| Steel | Named in clips | Unverified |
| Gold | Named in clips | Unverified |
| Sign | Shown around player level 50 in one recap | Unverified |
| Ruby | Named in clips | Unverified |
| Amber | Named in clips | Unverified |
| Solar | Named in clips | Unverified |
| Frost | Named in clips | Unverified |
| Lime Neon | Named in clips | Unverified |
One beginner recap hits Sign around level 50 while shopping later food. That is a timing sample, not a requirement table. If your level 50 shop does not show Sign, believe the live UI. Other recaps mention Obsidian or Phantom as end bars; those names stay off this table until a clip on this page’s footage shows them.
A full training-bar wiki would need cash cost, level lock, power per rep, and whether x2 Training Power doubles that rep. None of those fields are verified here. If a row is missing in your session, it is locked or renamed — not a cue to paste a fan price. After you can name the stand you are on, spend the next cash tick with the table below.
Use this when both the gym and the Food Shop are affordable. Throw Food For Animals Throw Power training wins when the next food would land short of the biome you bought it for — that is the whole throw-power-versus-shop question.
| Situation | Spend on | Why |
|---|---|---|
| First parked animal, starter grass only | Wooden bar | Apple still needs range for Forest |
| Forest is lootable, Apple still equipped | Banana (next clip food) | Food upgrade now has somewhere to land |
| Throws die before Forest | More pull-ups | Shop food cannot fix a short meter |
| Forest pays, Savanna still out of range | Train, then Toast ~$4K | Toast is wasted if it never leaves Forest |
| You can collect Savanna already | Food that matches that biome | Range gate is already open |
| Bar upgrade vs food, same cash pile | The spend that opens the next collectable tile | Name > screenshot rarity |
| Pass shop vs stand | Stand first | x2 Training Power multiplies a loop you already run |
Sportskeeda-style sheets list 38 foods / 16 tiers. Those rows matter after you can throw into the matching area. An expensive food thrown into starter grass is still a starter throw. Full shop: foods. Cash math: currency.
newtoplay snapshots list x2 Training Power at R$149 and x2 Cash at R$99. Confirm in-game. Neither pass teaches the throw line. Buy them after Wooden reps and a Forest collect are boring. Pass notes: game passes.
The reason this choice exists at all is the area gate — next section.
Areas sit on a distance line in front of the throw pad. Throw Food For Animals Throw Power is how far along that line a throw can travel. Forest and Savanna are not tickets; they are landings. If the food never arrives, the animals in that biome never spawn for you.
| If you cannot… | Usually missing | Do this |
|---|---|---|
| Leave starter grass | Throw Power and/or line stance | Wooden reps, then retry Carrot/Apple |
| Collect Forest after Apple | Range, not the $30 price | More pull-ups; confirm you stand on the line |
| Reach Savanna after Toast | Throw Power vs Toast cost | Train until the landing is walkable, then throw Toast |
| Use a later shop food | Area gate for that tier | Match food to areas, then train |
| Loot a Halloween map | Event range plus Throw Power | Treat map names as Unverified; train, then test |
A throw that disappears into an unreachable biome is a failed collect, even if the meter looked “Perfect.” Walk the landing. If you cannot reach the animal, that throw did not raise income. Shorten the hold or add reps until the landing is on grass you can loot.
Desert, Jungle, Mountains, Taiga, Prehistoric / Deep Waters, and Halloween extras appear in recaps. Required Throw Power per biome is TBA. Do not stall on Wooden because a late map screenshot looks cooler. Unlock the next collectable tile, park it, then revisit the stand.
Some sessions label a centered release as Perfect and show about +20. Treat ~+20 as Unverified. It is a timing bonus on top of Throw Power, not a second stat you can buy, and not a reason to run an auto-perfect script.
| Input | Clip recap | Use it like |
|---|---|---|
| Early release | Short landing | Retry on the line |
| Filled throw | Normal distance for current Throw Power | Default grind throw |
| Perfect | ~+20 — Unverified | Nice when it happens; do not script it |
| Max hold past Perfect | May overshoot loot range | Walk the landing; shorten if you cannot collect |
This wiki does not teach auto perfect throw, injectors, or “no key” dumps. A Perfect recap is a visual on the meter. If you never see the label, you can still finish Forest and Savanna with Wooden reps and Apple → Banana → Toast. Practice the line from the beginner guide.
+20 on a weak Throw Power still loses to a trained bar plus a normal throw that lands in Forest. Stack reps first. If a session also shows +5 per level at the same time as a Perfect label, that is two Unverified recaps, not a combined official formula.
Wasted gym cash is almost always buying food you cannot land, skipping Wooden for a named late bar, treating Unverified +5 as a skip, or installing a throw script.
| Mistake | Fix |
|---|---|
| Food before range | Train until the target biome is walkable, then buy |
| Inventing bar prices | Pay the live shop row or wait — this page lists names only |
| Skipping Wooden | Use the first stand until Forest collects |
| Copying +5 per level as a shop skip | Unverified — keep doing pull-ups |
| Treating Perfect ~+20 as guaranteed | Unverified bonus; do not script the meter |
| Buying x2 Training Power to skip learning the line | Learn Wooden first |
| Aiming at a late biome you cannot loot | Shorten the throw or add reps |
| Following a script / auto perfect throw page | Out of scope |
Next: spend cash on foods that match the range you just trained.
Then check which areas that food can actually land in.
Train on pull-up stands. Exact power per rep is Unverified. Two clips also show +5 per player level — still Unverified as a global rule.
Train until you can collect the biome that food is for. Apple at $30 still needs Wooden range for Forest.
Clips name Wooden, Steel, Gold, Sign (around lv50), Ruby, Amber, Solar, Frost, and Lime Neon. Order and prices are Unverified.
Clips show about +20. Treat it as Unverified. Do not use auto-perfect tools.
Throw Power gates distance. Buy food after the landing is walkable, not before.
Matched by build plan, shared topics, and guide progression — not random related links.